my suggestion is of course to buy a learning booklet and maybe even take a class on it. however taking a class can take up time you don't have. i highly advice getting a booklet to learn from as well and not just rely on this post, but i will tell you how to do Ukrainian egg art and any tips i have from my own experience.
your 1st step is to find the design in the book you want to do.
next you grab your regular egg straight out of the cartoon of eggs and follow to instructions that should tell you to draw guide lines around the egg to mark the cross sections of the longitude and latitude lines on the egg so that you know the center. usually you have to buy a certain holder for your egg. or you do what some people do and have a friend hold it and twist it as you draw your lines. although i highly suggest buying the holder for the egg, it makes it 10 times easier on you and a lot more accurate.
use light pencil strokes when drawing in your guide lines for the design. the pencil should be able to come off with just some water if you draw light enough, however try not to smudge it.
the design booklet should tell you the order for dying the egg, but if you are making up your own design in your head just keep in mind that lightest colors should always go first and that some light colors will mix a little bit when they over lap. another tip is in small area designs just use a Q-tip to dye that area
the wax's purpose is to keep the areas you put wax on white, or the color you started the egg at, that color for when you sip the egg in the die.
after you have your wax on you can dip your egg in the die. easiest step in the whole process, just make sure not to drop the egg!
now on to the melting of the wax. this is a long process that will take most of your patients. it can seem very fun, fast, and easy, but if you get too careless while melting the wax you could end up burning the egg shell which will then leave a nasty black stain that wont come off. always keep the egg a good distance from the candle. it may seem like its not melting, or its melting too slow and you can get closer, but that's how you end up getting too close because you just want the melting to go faster. don't fall for this trick!
the waxing and dying steps continue to repeat themselves until you get the the big part. the moment when the egg is done but there is still the yoke inside the egg. you cant keep it in forever so you are going to have to some how get the egg yolk out. so its needle time, and this is where many people crack under pressure (terrible pun intended). i remember one of the 1st eggs i ever did, i had worked on it all week and i was finally done and so proud of my work, and i cracked it right at this step because i held onto the egg too hard. my suggestion on this step is to just take a deep breath and stick the needle in nice and carefully, making sure to suck the egg out slowly and not too fast because you don't want to add to the pressure that's built up inside the egg.
well i hope this helped you in anyway to make the best Ukrainian egg art you can make. i do still want to remind you that this can not tell you everything you need to know, you always want to buy the full kit and instruction booklet.
Sunday, April 3, 2016
home alone sick?
being home sick is the worst, sure in elementary school it was the best thing ever because you get to skip school. However when you get older you learn that missing school or work just means more work to make up when you get back because we all know we aren't going to do that work while we are sick. so what do you do when you are home alone sick? watch movies, sleep, and eat a popsicles? sure that sounds great, unless you are sick for over a week and then you just get sick and tired of being trapped on the couch doing the same thing over and over again, which is nothing. So here are some things to keep you ocupied while home alone sick.
color a coloring book. seems childish but it will calm your mind and it actually quite soothing
do some sick day yoga. do some easy poses that dont work you out too much but get you up yet still relaxed. my favorite is the child's pose. because some of the usual posed might be a bit of a strain because you are sick, try using a pillow for support. some other posed are the seated side bend where you sit criss-cross apple sauce and with one arm over your head lean the opposite side of that arm in the air.
while you should rest most of the time it is good to get up and move around. its also important to eat healthy, so why not do both. getting up and walking around in the kitchen can sometimes be all you can take, but its a start to actually getting up more and more to get better. soup and or smoothies are always my go to when i'm sick. i also suggest using ice cream to make the smoothie thicker and sweeter.
make a bored jar. its just as it sounds, fill any jar with pieces of paper of things to do when you are bored. one this will give you something to do now when you are bored, and help you another time when you are bored and need something to do.
maybe if you aren't home alone bored games, or maybe card games are always sometime fun and easy to do. they also get your brain moving instead of just sitting with your eyes glues onto the TV all day.
something that i find i don't have time for in my usual week is a nice long hot bath. so while you have the time off, take this as a chance to get out the candles, bath bombs, and put on some music or read a book and just relax. just be sure not to fall asleep! i know if sounds ridiculous to remind someone of that but it happens and its a very unsafe thing to do. that's why reading a book is always nice because it keeps you awake and focused.
i hope this helps you on your next sick day because even though being sick stinks, it sure is nice to have a day off from school and work.
how to hang a college of pictures in your room
I do not think about it much but i use a camera almost every
day. for people of different ages I’m sure it varies but whether it’s using
snapchat, taking any picture on your phone, or professional pictures with a
nice camera, you use a camera more than you may think. the problem many people
seem to have is not knowing what to do with all of these pictures. some you may
frame and put on the wall and other you do not even remember why you still have
them on your phone but you still can’t imagine deleting them. I know i find it
hard to delete any picture, because every picture have a story and is a memory
that you feel if you delete from your phone you will forget forever. however if
you are like me and use your camera almost every day, you probably do not have
enough storage to keep all those memories on your phone. i honestly do not have
the table surface space for a framed picture, or enough frames for all my
pictures, but what i do have is some string, nail, hammer, and an open wall in
my room to put up all my pictures.
I’d just like to explain that finally figuring out the best
way to do this took some trial and error. I knew what i essentially wanted was
like continuous rows of my pictures hanging on my one wall, i just didn't know
how to do it. so I’ll tell you what not to do and then go into what to do. i
first tried to use those command hanging strip hooks to hang up the string and
those were a waste of money. they couldn't hold the weight of the pictures and
paper clips that i was using to hang up the pictures. by the way, paper clips
were not a good method for hanging the picture up. they made it so the pictures
were always tuned one direction instead of straight ahead. next i tried to
using nails and hanging the string as one continuous string going from each
nail to the next and down to the next row of 2 nails. that method did not work
either because the string would not stay tight enough. what i found to work the
best was to have 4 rows each with 1 nail of either side of the row where the
pictures would go. then i would measure
and cut durable thick string, leaving enough extra for human error. then i tied each end to
the 2 nails so it was fairly tight. lastly i used mini closed pins to hang the
pictures of the string. another tip if you have many pictures and not a lot of
wall space like myself, print off pictures that are half the size of regular 4
by 6 pictures so that they take up less space. i also found that it just looks
better overall with the smaller pictures, the bigger pictures looked too bulky
and stood out in the room. that pretty much all there is to it. if you want to add some color i suggest painting the close pins in fun ways to go with the color scheme of your room.
Sunday, March 27, 2016
Easter egg decorating
It's Easter time!! which means its time to get out your dying kits and start dipping those eggs. Decorating eggs for Easter is something I've done ever since i was younger. we would color the eggs with the white crayon and then dip the egg in the dye. I was always so amazed by how what i drew on the egg with the white crayon had stayed white and was magically visible because the rest of the egg was now painted a color. As i got older i became more adventurous in my dipping but eventually my siblings and i grew bored of the same thing every year. So now we try to go out and find different fun ways to decorate Easter eggs.
This year we did tye-dye eggs. all you need is a plastic bag, colored dye, straws with 1 end sealed shut (or anything that you can use to lift up drops of dye), eggs, and a cooling rack to get the eggs to dry.
Tip: also may need plastic gloves because it can get messy if you touch the eggs ever, also wax paper is good to put under your working and drying space to keep your table cloth save from any drips from the dye.
Step one: place egg in plastic bag and hold is so the opening is scrunched down so the egg is right at the opening of the bag.
Step two: use the straw to lift up any color dye and then carry it over to your egg. drop color or colors onto egg.
Tip use a different straw for each color
Step three: with what ever colors are on your egg. use the plastic bag to mix around the dye and completely cover the egg in dye
Tip: you can either cover the egg with one color 1st and then layer it or drop more then one color on the egg and mix them together with bag
Step four: set on drying rack
some other decorating things my family has tried with decorating eggs is stickers. we would do the regular dying of an egg and then go out and buy some face stickers and use them to put a mouth, some sunglasses, and maybe even a hat onto the egg. fun way to make the eggs come to life.
something i have also done which isn't quite your normal dying of Easter eggs, but its Ukrainian egg art. i learned it in middle school and it can be fun and in the end it looks really cool, but it takes a lot of patients and knowledge of how dying different colors on top of one another works. i wont go into to much detail but you use a tool that help you draw on wax onto an egg so then later when you dye it and then melt of the wax, the areas that had the wax stay white. and then you can put on more and more layers, and with the tiny wax tool you can very intricate designs. i encourage you to learn it, and try it, however this is not something kids would enjoy very much because it takes patients, fire, hot wax, and a steady hand.
No matter how you decorate your eggs just make it fun and creative and each egg with turn out very unique, as they should be.
how to garden in different weather and environments.
Gardening can be difficult and depending on the weather it can make it difficult to keep your plants looking nice and healthy.
he main and most important tip is to always do your research, and always read your labels. Ever place you go the vegetation is different, because different plants can only grow in certain climates, seasons, and because of other environmental factors. You don’t want to buy an expensive plant that only grows in the summer and then dies if where you live you have short summers. It is like planting a tropical plant in a desert and watering it a cup of water a day. Doing your research and reading your labels will tell you which plants can grow the best in your area, how much water they need, the amount of sunlight, the type of soil, etc. Some plants may need to get sun for twelve hours and other may only need it for three or else they dry out quickly. A big tip I have for finding the best plant and saving money is buying a plant that will come back next season so then you don’t need to go purchase a new one when that flowers season comes around again. Another hint to saving money is to buy seeds instead of already gown plants. Many people don’t like to take the time for them to grow but if you take good care of them it saves you more money and you can get more flowers out of a pack of seeds then a couple flowers in a container from the flower shop. A couple last tips are to keep it colorful, bright colors in a garden make a home look exciting, fun, and joyful. Also brick work is always great around a garden. It can help keep critters out and separate your garden from the grass or driveway. Brick can be used for a wall that goes up from the ground to the garden, or be in the ground making a line of separation from anything else. Anything you do with a garden and plants will look good and add lots of character to the outside of your homes what why I think it is important to know where to start and how to improve it as time goes on.
plants don't just grown in the spring and summer, some plants are year round or even are only up for a couple of weeks. these flowers are especially interesting because you have to be ready for them when they finally bloom.
why some colors work and some colors don't
its sad but true that not all colors work in all rooms or every type of home. for example a light blue might look good in the bathroom, or a kids room, but a light room in the living room not so much. I can try to picture a way that it could work, but nothing come to mind. When picking out colors for a room there are many things to think about such as; what do you want the feel of the room to be? is it an appropriate color for the bathroom or kitchen? does it go good with the flooring? all of these are great questions to ask when trying to pick out a color for a room. here are some tips to help you decide what looks best.
dark blue-sophisticated, a good color for a reading room or if you want a bit of a colorful in an office
light blue- kid friendly color. great for kids room.
light pink-also a very kids oriented color for a room
yellow- this is a very bright and sunny color, makes sense that its really for a room like a sun room. don't make the mistake that my mom did and try to paint the kitchen a mellow calm yellow, and wake up to the sun literally in her kitchen. I'm glad to say that immediately that day she repainted it white.
green- you have to be really bold to use a color like green. green shoes nature and sometimes wealth but I would not recommend painting your living room green under any circumstance.
light purple- this is a very spiritual color
white- basic color that can go perfect in any room. is great for opening up spaces and making everything seem brighter and bigger. always a great color choice if you aren't a person who likes colored walls.
purple- this color can be a very calming and also bold color choice
maroon- this is one of my favorite colors that has been in style this season that I have seen in many kitchens, living rooms, and bedrooms.
If you are not a big fan of your entire living area being a color you can always use the color whether its maroon, or blue, or purple as just an accent wall. so one wall will be a color and the rest will be either a white, cream, or gray. that is what I did for my room because I didn't like the idea of my entire room being purple so I had one wall purple and the rest grey and used purple accent pieces to match like my purple curtains and some purple pillows.
when picking out the types of paint there are certain paints that are made especially for easy cleaning in case of messes, and better wear and tear resistance, both great qualities to have in a paint if you have kids. this definitely came in handy when my little sister for some reason decided to draw with black marker all over the white walls in the living room.
patterns are a great thing to play will on walls but can also be tricky to match with other things in the room. my advice for this is you will either love it or hate is. also kids rooms are good way to test this out and a textured or patterned wall can always look good in a kids room because they are a kid and there room should be colorful and full of fun shapes and patterns.
I am sure there are more things to think about when picking out a color for a room but I hope these tips helped you pick the right color for your room.
Sunday, March 13, 2016
no carb cauliflower pizza.
pizza is one of the best foods by far, however the bad thing about pizza is the carbs! so good but not so good for you. the best way to eat pizza with out the loads of carbs is no carbs at all. no carbs? no problem, just make your own crust with cauliflower instead of flour.


Step two: heat chopped up cauliflower in the microwave tell steamy


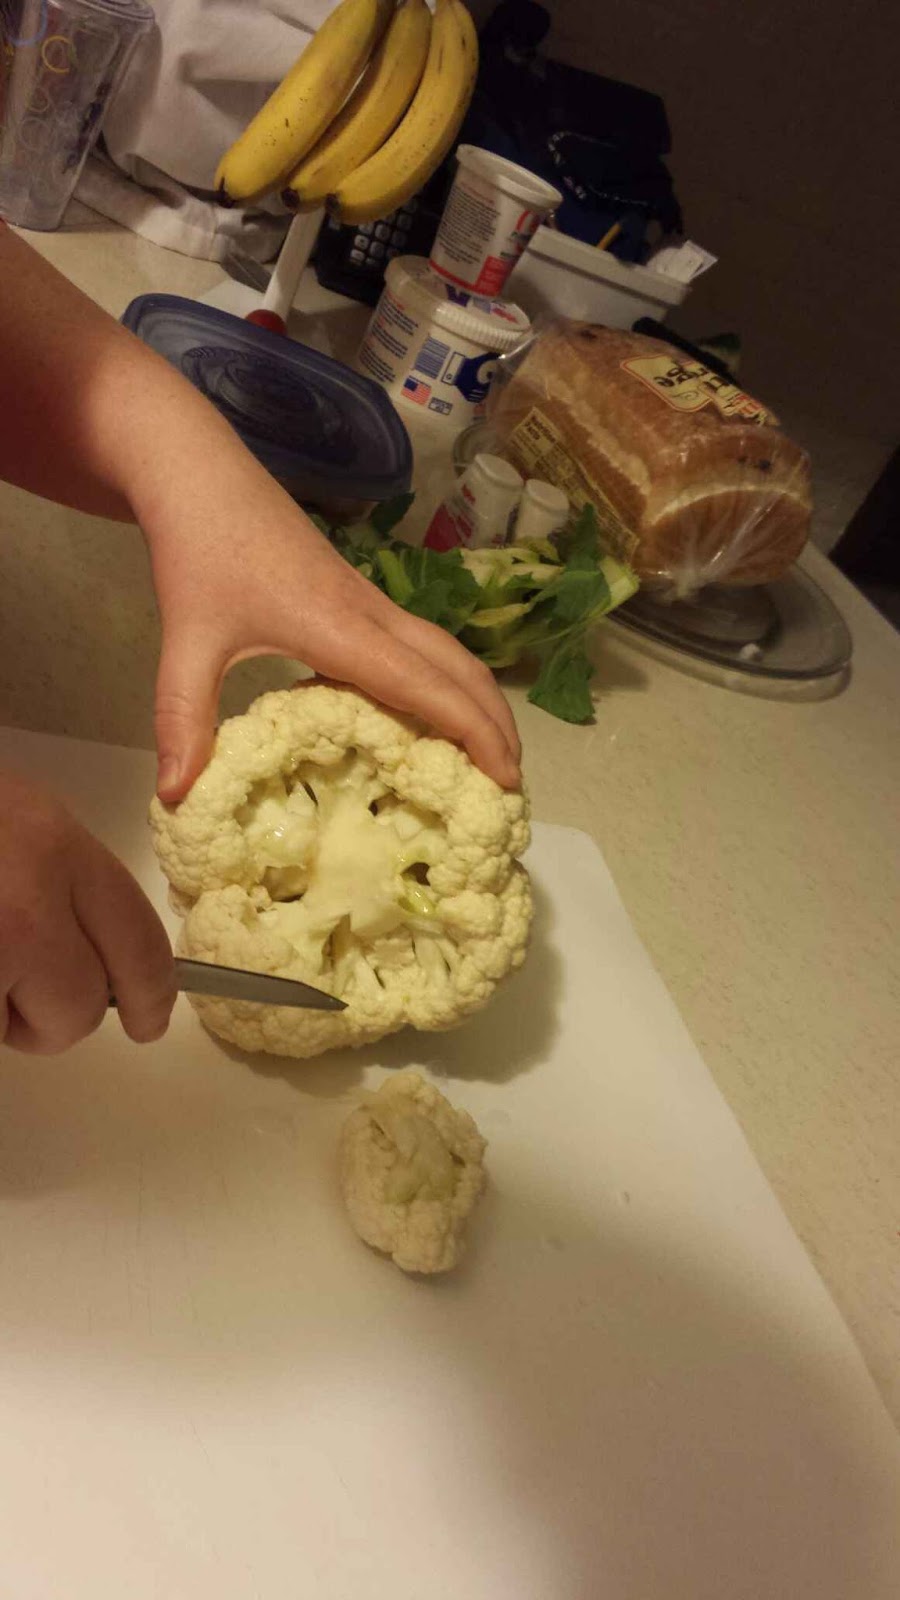
Step three: in a bowl combine 2 eggs and Italian seasoning to taste (meaning the amount of seasoning should be as much as you like)


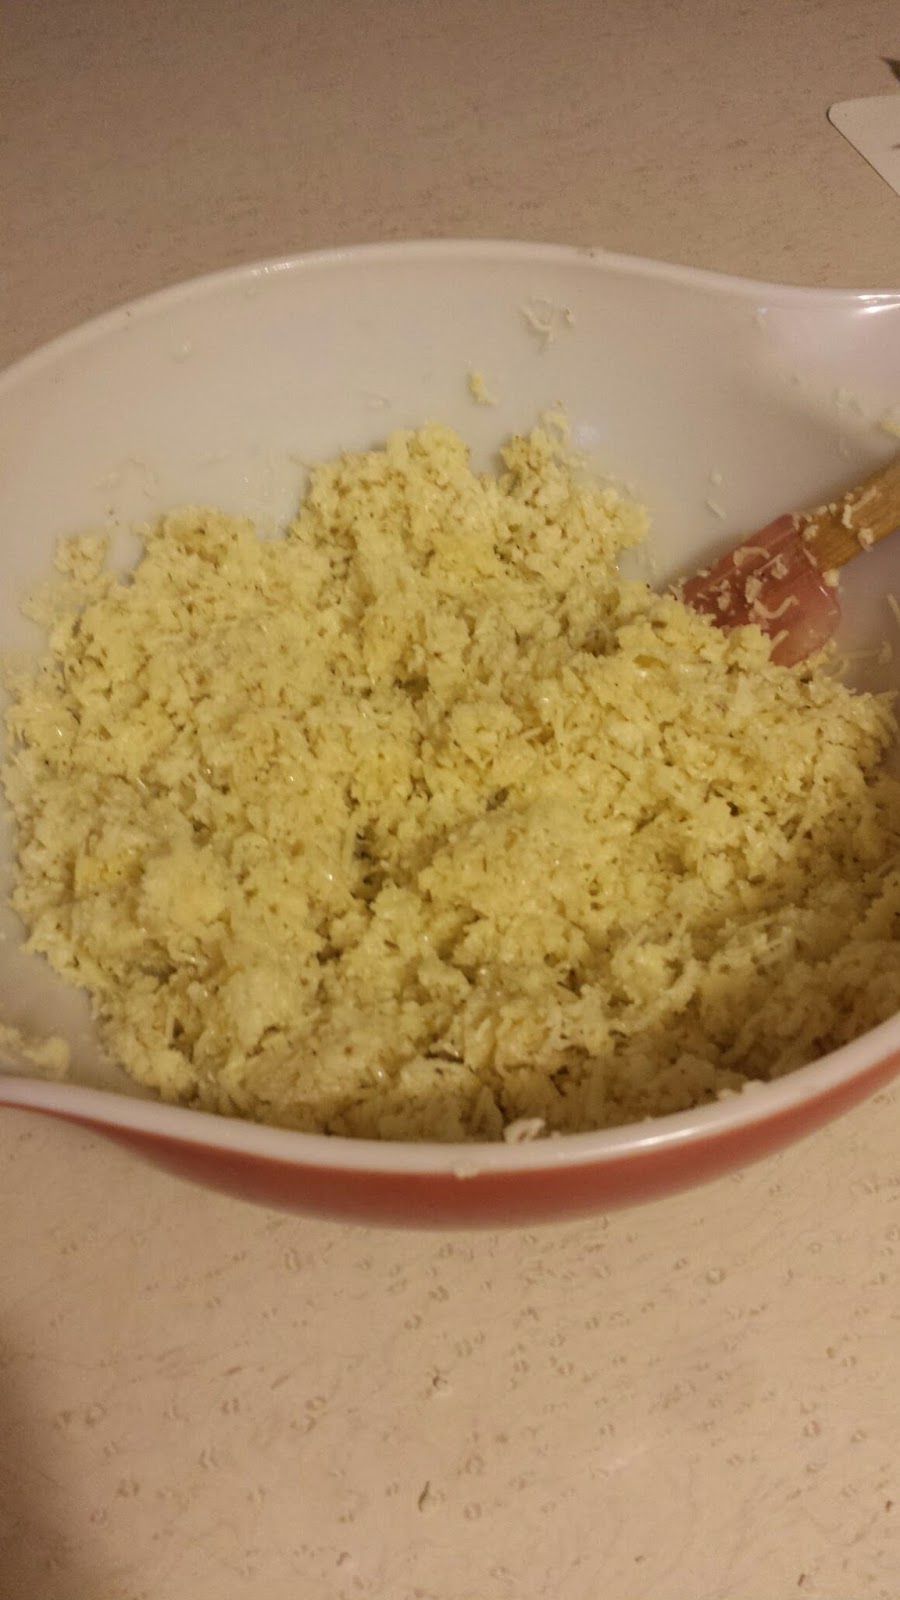
Step four: add italian style cheese to egg mixture. then mix in the cauliflower.


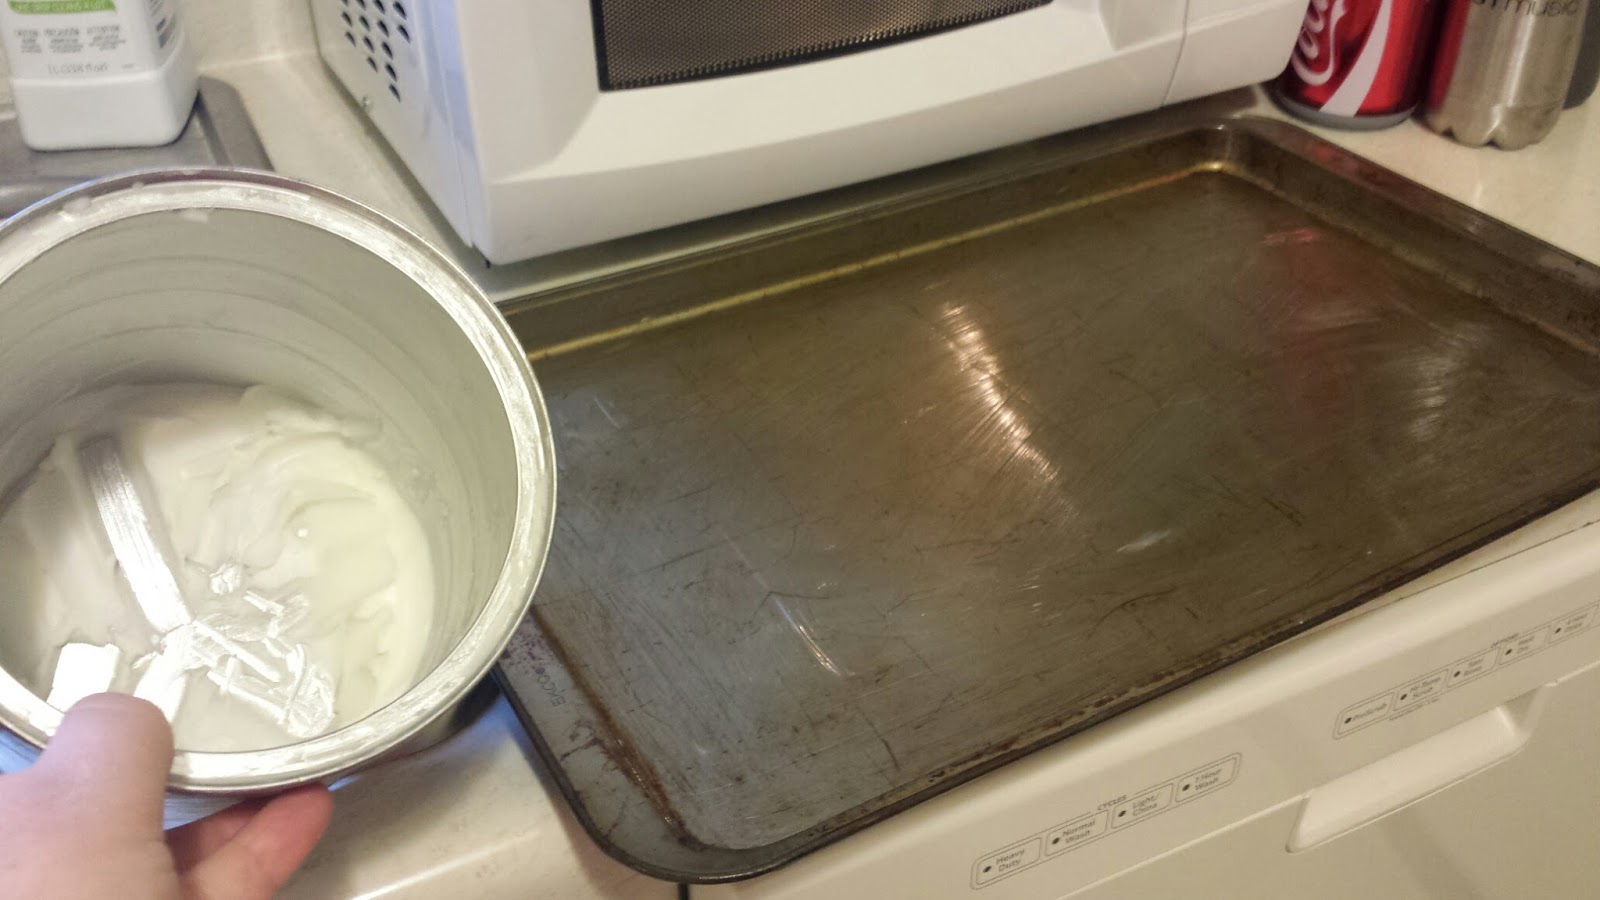
Step five: butter pan with crisco and evenly spread out the pizza crust onto the pan


Step eight: after pizza crust is golden brown, start to add your sauce and topping. then stick back into the oven for another 10 min and there yah go!

Step one: cut up one head of cauliflower and grind up in food processer.


Step three: in a bowl combine 2 eggs and Italian seasoning to taste (meaning the amount of seasoning should be as much as you like)


Step four: add italian style cheese to egg mixture. then mix in the cauliflower.


Step five: butter pan with crisco and evenly spread out the pizza crust onto the pan


Step seven: brush on a layer of olive oil and then stick into the oven at 450 for 10 min


Subscribe to:
Posts (Atom)