Sunday, April 24, 2016

wedding preperations at home

Weddings are expensive, there is no need to argue with that statement. however there are many ways you can cut the costs of a wedding starting with making your own decorations, invitation, centerpieces, ect. in a previous blog i showed you how i did the chalkboard mason jars which we are using for the wedding rehearsal center pieces. here is my idea for what is going to be going inside the mason jars.
All you will need are some plastic flowers, water, and glass pebbles. The colors for the wedding are red, black, and the chosen flower is the orchid. So for the center pieces we went out and bought small red flowers and white orchids from Hobby Lobby, along with an assortment of white, clear, and white mate pebbles. To start off, place the pebbles in the bottom of the jar. The pebbles will be used to keep the flowers in place. You only need to fill the jar to barley a fourth of the way full with pebbles. Next you will stick in the small flowers into the jar and cut accordingly so that the flowers don't reach any higher than the top of the jar. Next you will add in a single orchid into the center of the red flowers. Finally you fill with water and there you go! Another idea that you can use this for, if you don't like the white orchid on top is to leave room in the jar for a candle to float on top of the water. I think this is my favorite way to do this center piece because a candle floating on water over flowers is very beautiful to have for decoration. However the candle version is probably best for night time or outside occasions, rather than a middle of the day occasion. This center piece i would describe as being pretty casual with the mason jars, but still simple and pleasing to the eye.

Here is an example, not of my own taking.

chalkboard mason jars

mason jars can be used for almost anything. you can use them as glasses, candle holders, or as center pieces for a rehearsal dinner. The craft i'm about to show you is something i am working on for my brothers wedding. However you can use this for any type of center pieces or as candle holders, which is my plan after the rehearsal dinner. whats even better is using chalk board paint because it allows you to decorate and write anything and then being able to erase it and customize it for any occasion.

Step one: use tape to block out square block or really any straight  edge shape.
Tip: its a good idea to have a couple practice jars,  you can use ones you don't  about such as recycles glass food jars from food like salsa, or nacho cheese.
Step two: take a square tipped brush to paint on black chalk paint. you can buy it at stores such as Hobby Lobby, Micheal, or as i was lucky enough to find small bottles in the dollar section at target.
tip: it only took 1 tiny bottle like this to cover about 10 mason jars like i did and there is still plenty left to do more. don't over estimate how much you need, a little bottle can go a long way.


Step three: Lay jars horizontally while waiting for paint to dry and then add another coat of paint on. i suggest laying the mason jars on empty egg cartons to keep them from rolling and smudging the paint.
Tip: I found that cardboard cartoons worked better than styrafoam. if you are painting both sides of the mason jar as i did some of the paper from the egg cartoon may stick to the paint, but after both sides have dried it can be easily covered up by applying a small bit of paint on the paper that is stuck. You will be able to set the jar vertacly after this because that little bit of paint wont drip like it would have in the begining when you put on paint.

Step four: peel off tape
tip: use an X-acto knife to scrap off any paint that smudged or leaked through the tape.
Step five: for any decoration or words you want to be permanent on the paint use a white paint permanent marker as i did for one of my practice jars. otherwise use regular chalk to draw and erase what ever you would like.


HGTV shows

I've blogged before about different HGTV shows and my rating of them and why or why not you should watch them, but i thought i should write a post about my overall rating of HGTV shows in general. I love watching HGTV shows when i'm super bored in the summer, but don't get to thinking that all i watch are HGTV shows. i am way to busy to have time to sit down and watch any kind of TV, and if i do, its usually some sitcom on Netflix. What ive found is wrong with HGTV shows is once you realize that most of them are fake, set up, or just arent as great as they are shown on television, it becomes less fun to watch. Most shows the renovations are real, but the expense isn't cheep. That is why still to this day i will say that the best show ever on HGTV was Extreme Makeover Home Edition. It probably didn't give you as much advice on home improvement as other shows do, but this show would make a big and beautiful house for an amazing worthy family and that is what made the show so great.
Some People make a huge deal about how a lot of the shows on HGTV are fake, and yah it may be true, but sometimes if they didn't have those fake parts to the show, the show wouldn't be as good. That's the reason they manipulate what you get to see on TV, and it makes sense. It ruins the fun to know all the negative parts of the show.

Sunday, April 17, 2016

feminism in the home

    I'd just like to start by saying that I would not consider myself a feminist and I do not agree that the stereotype I of women in a home is always true but i also agree that the stereotype does still exist. In class we were given a paper to read and them talk about in discussion. the title of the paper was "feminism is dead", just by the title you can guess what the paper was about. so when thinking about the arguments of how women are treated differently one that came up was women's role at home.

    It’s a stereotype for many people that women are the ones who clean, cook, and take care of the home and the kids, and the men are the ones who do the heavy lifting work and then otherwise they just sit back and let the women take care of them. I of course, like many women, disagree with this stereotype. I think it can be either gender who takes certain jobs around the home, but there’s nothing sexist if it is the case that the women does the dishes and the man mows the lawn. However you can’t argue that the stereotype doesn’t apply in a lot of situations. In my AP psychology class everyone took a survey about which parent in the house did which chore around the house. For the most part, including in my home, everyone got the same results. The results were that the mother seems to do all the stereotypical “female” chores, such as cooking and laundry, and the dad does most of the “male” chores, such as mow the lawn and pay the bills. so as you can see in most homes, whether they think this way of living should exist or not, it it just the way they work in their home. my dad doesn't complain that "this is a women's job" when he is asked to do the dishes or cook dinner, but usually he only does these chores when he is asked to becasue my mom will be gone for a while. Even then usually those chores are passed on to me or one of my sisters. there are examples however where i see this stereotype doesn't exist, such as my uncles house. in their family my uncle is the one who cooks every meal, and honestly that's just becasue hes a better cook than my aunt. I don't see what happens in their daily lives with the rest of the chores, but i know for the most part they both do all the chores in the house, it just depends on who is there and who has the time to do the things that need to be done. I honestly think this is how a house should run. Any married couple, no matter the genders, should split the chores. I think its the key to a happy home and a happy life. If everyone, including the kids, did every chore no matter what stereotypical label is put on that certain chore, then I think everyone, especially the kids, would learn that there is no difference between what gender should do and can do what chore. People may think this isn't a big issue, and other may over react to how big of an issue this is. However what i believe is that if the wife is good at cooking and can clean and hates to mow the lawn, that's fine, and is the husband is good at cooking and can clean, and hates to mow the lawn, that's fine too. just make sure someone mows the lawn, unless you live in California, then you are probably fine, but back to the point. There's nothing wrong with doing the stereotypical 'female" or "male" chores and there's nothing wrong with the husband cooking, or the wife fixing the plumbing. All you need to do it make sure the stuff that needs to get done, gets done, no matter who does it. However i must add this one bit, make sure its evenly split. in a home where one of the spouses does the majority of the house work and the other one just sits back and relaxes, I would have to imagine that it would not settle well with a certain person in the relationship. So I guess there is my on going argument on how feminism in the home is not a thing, stereotypes are always there, but binding by them or not works either way. 


different ways to get stains out

stains are the most annoying and frustraiting thing that happens on a daily basis, but not every method works for every stain. so here is a list of just some of the ones i find to be most successful.  
when getting out any stain its best to try to remove the stian as soon as possible becasue once it becomes dry and hard it is 10 times harder to get out.

 LOC- its a miracle worker. use this is quickly remove stains by applying LOC and then rubbing it in. ususaly stains will come out just from this

Oxy-clean- pray right before you put in wash to help stain removal. works on everything
     both oxy-c lean and LOC are great for getting out blood and ink stains. if you are a women you know how important that is.

Clorox- be careful because it really only works on whites and if used on any other color it will cause clothes to drastically fade or turn white

cold water- alwasy use cold water when trying to get out stains

rubbing, rub the stain with soup, water, and what ever cleaning supply until the stain comes out.

dont wash or dry tell stains are all the way out

hydroporoxide can also help a lot with getting out stains, but careful not to over rub and wear out the color.


Sunday, April 10, 2016

difference between yellow and blue light

difference between LED lights and fluorescent lights. many people still don't understand the different between the two and i think its important to know when going out shopping for new lights in the house.
  LED lights tend to give of a white or "blue" color. personally its not a very warm and inviting color for your home, which works out okay because these types of bulbs are best for direct light. so for example a flashlight or a bed lamp because the light will go exactly where it is pointed
  Fluorescent lights are different because they give off more of a yellow light which is more of an inviting and soft light that you would want in your home. they are best for lighting up an entire room such as your living room or even a warehouse.
  As far as quality of light bulbs, LED lights last about 6 times longer as fluorescent bulbs do and are 5 times more efficient because they use less watts while still lasting longer. this all taken into account LED lights are more expensive than fluorescent lights. Also keep in mind that one dangerous hazard about LED lights is that they contain mercury which can be poisonous if the bulb is broken.


how to get the nasty sticky stuff off your glass jars

A great material that can be used in many crafts and DIY projects are glass jars, but you don't always need to go out and buy some. i'm sure you have many already in your kitchen. instead of sticking the glass jars from the store bought food, you can clean it out and re-use it. whats annoying about this though is getting off the nasty sticky stuff after you have ripped off the paper logo that's wrapped around it. so here is my solution to that problem:

After you have tried the constant scratching and rubbing to get the paper and glue off the jar, put a layer of peanut butter on the jar and let it sit there. next time you are at the sink just wash and wipe the peanut butter off and the paper and glue will come right off with it. as easy at that!

Sunday, April 3, 2016

how to do ukrainian egg art

my suggestion is of course to buy a learning booklet and maybe even take a class on it. however taking a class can take up time you don't have. i highly advice getting a booklet to learn from as well and not just rely on this post, but i will tell you how to do Ukrainian egg art and any tips i have from my own experience.

  your 1st step is to find the design in the book you want to do.
  next you grab your regular egg straight out of the cartoon of eggs and follow to instructions that should tell you to draw guide lines around the egg to mark the cross sections of the longitude and latitude lines on the egg so that you know the center. usually you have to buy a certain holder for your egg. or you do what some people do and have a friend hold it and twist it as you draw your lines. although i highly suggest buying the holder for the egg, it makes it 10 times easier on you and a lot more accurate.
  use light pencil strokes when drawing in your guide lines for the design. the pencil should be able to come off with just some water if you draw light enough, however try not to smudge it.
  the design booklet should tell you the order for dying the egg, but if you are making up your own design in your head just keep in mind that lightest colors should always go first and that some light colors will mix a little bit when they over lap. another tip is in small area designs just use a Q-tip to dye that area
  the wax's purpose is to keep the areas you put wax on white, or the color you started the egg at, that color for when you sip the egg in the die.
  after you have your wax on you can dip your egg in the die. easiest step in the whole process, just make sure not to drop the egg!
  now on to the melting of the wax. this is a long process that will take most of your patients. it can seem very fun, fast, and easy, but if you get too careless while melting the wax you could end up burning the egg shell which will then leave a nasty black stain that wont come off. always keep the egg a good distance from the candle. it may seem like its not melting, or its melting too slow and you can get closer, but that's how you end up getting too close because you just want the melting to go faster. don't fall for this trick!
  the waxing and dying steps continue to repeat themselves until you get the the big part. the moment when the egg is done but there is still the yoke inside the egg. you cant keep it in forever so you are going to have to some how get the egg yolk out. so its needle time, and this is where many people crack under pressure (terrible pun intended). i remember one of the 1st eggs i ever did, i had worked on it all week and i was finally done and so proud of my work, and i cracked it right at this step because i held onto the egg too hard. my suggestion on this step is to just take a deep breath and stick the needle in nice and carefully, making sure to suck the egg out slowly and not too fast because you don't want to add to the pressure that's built up inside the egg.

well i hope this helped you in anyway to make the best Ukrainian egg art you can make. i do still want to remind you that this can not tell you everything you need to know, you always want to buy the full kit and instruction booklet.

home alone sick?

being home sick is the worst, sure in elementary school it was the best thing ever because you get to skip school. However when you get older you learn that missing school or work just means more work to make up when you get back because we all know we aren't going to do that work while we are sick. so what do you do when you are home alone sick? watch movies, sleep, and eat a popsicles? sure that sounds great, unless you are sick for over a week and then you just get sick and tired of being trapped on the couch doing the same thing over and over again, which is nothing. So here are some things to keep you ocupied while home alone sick.

color a coloring book. seems childish but it will calm your mind and it actually quite soothing

do some sick day yoga. do some easy poses that dont work you out too much but get you up yet still relaxed. my favorite is the child's pose. because some of the usual posed might be a bit of a strain because you are sick, try using a pillow for support. some other posed are the seated side bend where you sit criss-cross apple sauce and with one arm over your head lean the opposite side of that arm in the air.

while you should rest most of the time it is good to get up and move around. its also important to eat healthy, so why not do both. getting up and walking around in the kitchen can sometimes be all you can take, but its a start to actually getting up more and more to get better. soup and or smoothies are always my go to when i'm sick. i also suggest using ice cream to make the smoothie thicker and sweeter.

make a bored jar. its just as it sounds, fill any jar with pieces of paper of things to do when you are bored. one this will give you something to do now when you are bored, and help you another time when you are bored and need something to do.

maybe if you aren't home alone bored games, or maybe card games are always sometime fun and easy to do. they also get your brain moving instead of just sitting with your eyes glues onto the TV all day.

something that i find i don't have time for in my usual week is a nice long hot bath. so while you have the time off, take this as a chance to get out the candles, bath bombs, and put on some music or read a book and just relax. just be sure not to fall asleep! i know if sounds ridiculous to remind someone of that but it happens and its a very unsafe thing to do. that's why reading a book is always nice because it keeps you awake and focused.

i hope this helps you on your next sick day because even though being sick stinks, it sure is nice to have a day off from school and work.

how to hang a college of pictures in your room

I do not think about it much but i use a camera almost every day. for people of different ages I’m sure it varies but whether it’s using snapchat, taking any picture on your phone, or professional pictures with a nice camera, you use a camera more than you may think. the problem many people seem to have is not knowing what to do with all of these pictures. some you may frame and put on the wall and other you do not even remember why you still have them on your phone but you still can’t imagine deleting them. I know i find it hard to delete any picture, because every picture have a story and is a memory that you feel if you delete from your phone you will forget forever. however if you are like me and use your camera almost every day, you probably do not have enough storage to keep all those memories on your phone. i honestly do not have the table surface space for a framed picture, or enough frames for all my pictures, but what i do have is some string, nail, hammer, and an open wall in my room to put up all my pictures.

I’d just like to explain that finally figuring out the best way to do this took some trial and error. I knew what i essentially wanted was like continuous rows of my pictures hanging on my one wall, i just didn't know how to do it. so I’ll tell you what not to do and then go into what to do. i first tried to use those command hanging strip hooks to hang up the string and those were a waste of money. they couldn't hold the weight of the pictures and paper clips that i was using to hang up the pictures. by the way, paper clips were not a good method for hanging the picture up. they made it so the pictures were always tuned one direction instead of straight ahead. next i tried to using nails and hanging the string as one continuous string going from each nail to the next and down to the next row of 2 nails. that method did not work either because the string would not stay tight enough. what i found to work the best was to have 4 rows each with 1 nail of either side of the row where the pictures would go. then i would  measure and cut durable thick string, leaving enough extra for human error. then i tied each end to the 2 nails so it was fairly tight. lastly i used mini closed pins to hang the pictures of the string. another tip if you have many pictures and not a lot of wall space like myself, print off pictures that are half the size of regular 4 by 6 pictures so that they take up less space. i also found that it just looks better overall with the smaller pictures, the bigger pictures looked too bulky and stood out in the room. that pretty much all there is to it. if you want to add some color i suggest painting the close pins in fun ways to go with the color scheme of your room. 

Sunday, March 27, 2016

Easter egg decorating

It's Easter time!! which means its time to get out your dying kits and start dipping those eggs. Decorating eggs for Easter is something I've done ever since i was younger. we would color the eggs with the white crayon and then dip the egg in the dye. I was always so amazed by how what i drew on the egg with the white crayon had stayed white and was magically visible because the rest of the egg was now painted a color. As i got older i became more adventurous in my dipping but eventually my siblings and i grew bored of the same thing every year. So now we try to go out and find different fun ways to decorate Easter eggs.

This year we did tye-dye eggs. all you need is a plastic bag, colored dye, straws with 1 end sealed shut (or anything that you can use to lift up drops of dye), eggs, and a cooling rack to get the eggs to dry.
Tip: also may need plastic gloves because it can get messy if you touch the eggs ever, also wax paper is good to put under your working and drying space to keep your table cloth save from any drips from the dye.

Step one: place egg in plastic bag and hold is so the opening is scrunched down so the egg is right at the opening of the bag.
Step two: use the straw to lift up any color dye and then carry it over to your egg. drop color or colors onto egg.
Tip use a different straw for each color
Step three: with what ever colors are on your egg. use the plastic bag to mix around the dye and completely cover the egg in dye
Tip: you can either cover the egg with one color 1st and then layer it or drop more then one color on the egg and mix them together with bag
Step four: set on drying rack

some other decorating things my family has tried with decorating eggs is stickers. we would do the regular dying of an egg and then go out and buy some face stickers and use them to put a mouth, some sunglasses, and maybe even a hat onto the egg. fun way to make the eggs come to life.

something i have also done which isn't quite your normal dying of Easter eggs, but its Ukrainian egg art. i learned it in middle school and it can be fun and in the end it looks really cool, but it takes a lot of patients and knowledge of how dying different colors on top of one another works. i wont go into to much detail but you use a tool that help you draw on wax onto an egg so then later when you dye it and then melt of the wax, the areas that had the wax stay white. and then you can put on more and more layers, and with the tiny wax tool you can very intricate designs. i encourage you to learn it, and try it, however this is not something kids would enjoy very much because it takes patients, fire, hot wax, and a steady hand.

No matter how you decorate your eggs just make it fun and creative and each egg with turn out very unique, as they should be.

how to garden in different weather and environments.

Gardening can be difficult and depending on the weather it can make it difficult to keep your plants looking nice and healthy.

he main and most important tip is to always do your research, and always read your labels. Ever place you go the vegetation is different, because different plants can only grow in certain climates, seasons, and because of other environmental factors. You don’t want to buy an expensive plant that only grows in the summer and then dies if where you live you have short summers. It is like planting a tropical plant in a desert and watering it a cup of water a day. Doing your research and reading your labels will tell you which plants can grow the best in your area, how much water they need, the amount of sunlight, the type of soil, etc. Some plants may need to get sun for twelve hours and other may only need it for three or else they dry out quickly. A big tip I have for finding the best plant and saving money is buying a plant that will come back next season so then you don’t need to go purchase a new one when that flowers season comes around again. Another hint to saving money is to buy seeds instead of already gown plants. Many people don’t like to take the time for them to grow but if you take good care of them it saves you more money and you can get more flowers out of a pack of seeds then a couple flowers in a container from the flower shop. A couple last tips are to keep it colorful, bright colors in a garden make a home look exciting, fun, and joyful. Also brick work is always great around a garden. It can help keep critters out and separate your garden from the grass or driveway. Brick can be used for a wall that goes up from the ground to the garden, or be in the ground making a line of separation from anything else. Anything you do with a garden and plants will look good and add lots of character to the outside of your homes what why I think it is important to know where to start and how to improve it as time goes on.

plants don't just grown in the spring and summer, some plants are year round or even are only up for a couple of weeks. these flowers are especially interesting because you have to be ready for them when they finally bloom. 

why some colors work and some colors don't

its sad but true that not all colors work in all rooms or every type of home. for example a light blue might look good in the bathroom, or a kids room, but a light room in the living room not so much. I can try to picture a way that it could work, but nothing come to mind. When picking out colors for a room there are many things to think about such as; what do you want the feel of the room to be? is it an appropriate color for the bathroom or kitchen? does it go good with the flooring? all of these are great questions to ask when trying to pick out a color for a room. here are some tips to help you decide what looks best.
dark blue-sophisticated, a good color for a reading room or if you want a bit of a colorful in an office
light blue- kid friendly color. great for kids room.
light pink-also a very kids oriented color for a room
yellow- this is a very bright and sunny color, makes sense that its really for a room like a sun room. don't make the mistake that my mom did and try to paint the kitchen a mellow calm yellow, and wake up to the sun literally in her kitchen. I'm glad to say that immediately that day she repainted it white.
green- you have to be really bold to use a color like green. green shoes nature and sometimes wealth but I would not recommend painting your living room green under any circumstance.
light purple- this is a very spiritual color
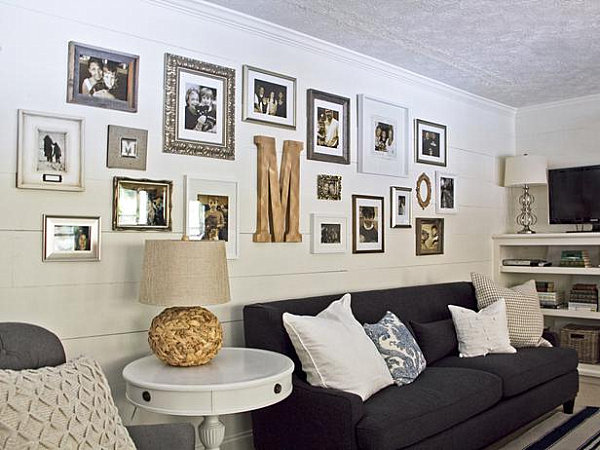
white- basic color that can go perfect in any room. is great for opening up spaces and making everything seem brighter and bigger. always a great color choice if you aren't a person who likes colored walls.
purple- this color can be a very calming and also bold color choice
maroon- this is one of my favorite colors that has been in style this season that I have seen in many kitchens, living rooms, and bedrooms.

If you are not a big fan of your entire living area being a color you can always use the color whether its maroon, or blue, or purple as just an accent wall. so one wall will be a color and the rest will be either a white, cream, or gray. that is what I did for my room because I didn't like the idea of my entire room being purple so I had one wall purple and the rest grey and used purple accent pieces to match like my purple curtains and some purple pillows.

     when picking out the types of paint there are certain paints that are made especially for easy cleaning in case of messes, and better wear and tear resistance, both great qualities to have in a paint if you have kids. this definitely came in handy when my little sister for some reason decided to draw with black marker all over the white walls in the living room.
     patterns are a great thing to play will on walls but can also be tricky to match with other things in the room. my advice for this is you will either love it or hate is. also kids rooms are good way to test this out and a textured or patterned wall can always look good in a kids room because they are a kid and there room should be colorful and full of fun shapes and patterns.
    I am sure there are more things to think about when picking out a color for a room but I hope these tips helped you pick the right color for your room.

Sunday, March 13, 2016

no carb cauliflower pizza.

pizza is one of the best foods by far, however the bad thing about pizza is the carbs! so good but not so good for you. the best way to eat pizza with out the loads of carbs is no carbs at all. no carbs? no problem, just make your own crust with cauliflower instead of flour.

Step one: cut up one head of cauliflower and grind up in food processer. 


 Step two: heat chopped up cauliflower in the microwave tell steamy


Step three: in a bowl combine 2 eggs and Italian seasoning to taste (meaning the amount of seasoning should be as much as you like)


 Step four: add italian style cheese to egg mixture. then mix in the cauliflower.

Step five: butter pan with crisco and evenly spread out the pizza crust onto the pan


Step seven: brush on a layer of olive oil and then stick into the oven at 450 for 10 min


 Step eight: after pizza crust is golden brown, start to add your sauce and topping. then stick back into the oven for another 10 min and there yah go!


icecream carmel delight

my family and i used to always watch the original chopped show on the Food network and one day my family got the idea to have our very own chopped competition at home. we are given certain ingredients that you have to use and anything else in the kitchen is free game to make up a recipe and serve it to the judges or in our case, our parents. here is a recipe i came up with when giving the ingredients of vanilla wafflers and strawberries.

Step one: crush up 1 box of animal crackers in a food proceser.
step two: slowly mealt 1 stick of butter in microwave
step three: mix vanilla waffers and and butter in a medium bowl.
step four: lay an even layer of the vanilla waffer mix into 8 by 8 pan
Step five: heat carmel in microwave tell at consistensy that is easy to spread.
Step six spread carmel envenly in pan.
Step seven: soften ice cream by letting in sit out for a bit before scooping into the pan. flatten the top.
Step eight: put into freezer
Step six: cut up strawberries to put onto ice cream when serving dessert.


Sunday, February 28, 2016

bathroom styles

when i was younger i remember being jealous of my friend who had the fuzzy seat cover for their toilet and the matching fuzzy rug that fit perfectly around the toilet, but now when i look back at that i wonder what the point of those things were. you never sit on the top of the toilet, so why does it need to be comfortable? there are many weird fads that come in and out of style for the bathroom. for example carpet in the bathroom, pink bathtubs, and floral tiles. thankfully bathrooms these days have evolved from those God awful trends. so whats next for the bathroom, we've gone through the everything pink, everything having crown molding and the terrible idea of carpet phases. now we are in the modern times of everything looking sleek, shinny, and perfect. we like the bathroom to be calming but very organized and put together. the bathroom seems like the least likely place for technology, but i see that is wear we are headed. we already have the speakers in the shower, and the fancy toilets have been around in Japan for a long time. in public bathrooms we have automatic everything which we find very helpful. i see our future being TV's in the bathroom, bathtubs that draw your bath for you, high tech temperature settings for the shower, hopefully technology that will help us save water at the sink. i hope to learn more about the past of the bathroom and how the styles have evolved.

what to do with old valentines day flowers

flowers are always a great gift to receive for many occasions. i really hope you received flowers for valentines day and if you did hopefully they haven't became wilted yet. when flowers start to get old it is really hard to have to throw them away. here are some ideas of what to do with those flowers.

banana snack

when coming home from school, or stopping home quick between practice and work, a quick an easy snack is always fruit. whats great about fruit is its healthy, sweet, and delicious. one thing i like ot make at home is banana rolled in peanut butter and grahm cracker. its super simple.

step one: peel and cut a banana into slices.
Step two; put about a forth of a cup of peanut butter into a small mixing bowl.
Step three: grind up grahm cracker in food processor
Step four: mix grahm crackers with peanut butter until a good consistency so that it is mixed evenly
Step five: roll the edges of each individual banana slice in peanut butter and gram crackers.
Step six: roll the edges of each individual banana slice in more of just the gram cracker crust
tip: for more yummy goodness drizzled chocolate over sliced bananas or dip in chocolate and freeze for later.
tip: this is a snack that needs to be eaten right away or it will become rotten.  

Sunday, February 21, 2016

love it or list it

love it or list it is a HGTV show that is about the business partner duo of Hilary Farr, the interior designer, and David Visentin, who is the reinstate agent. Hilary and David help their clients either love their current home or sell it and buy a different one. what great about this show is either way the client gains something from this. I wouldn't rate this show as one of my top favorite on HGTV however there are some things about it that i like better than other shows. the competition between Hilary and David add a comical banter to the show. they both want what's best for the client, however they think their way is always better. on one side Hilary redoes their current home to make it more appealing to the owner, while David shows the clients new homes that he believes will be more to their liking. I think one benefit or problem about this show is that when the client is deciding if they want to stay in their new and improved home or go to a new home, which usually has other benefits that they have been wanting such as the area the house is located, why would you not list your home. You not only get to go to the more improved location, but you have a home that is modernly renovated and ready to sell. i think this show is pretty good, but it wouldn't be one of my first recommendations. however its much more popular than some of the other HGTV shows. its been around for a while, since 2008 and has had 10 seasons.

peanut butter balls


Breakfast is the most important meal of the day, we all know that. However we still don’t make the time do make sure we get the nutritious breakfast we need in the morning to energize us for the day. Here a recipe that I like to make for those mornings when I am in a rush and I just want to skip breakfast and leave the house on an empty stomach. They are called peanut butter balls. It is very simple and there is no baking needed.


Step one: in a bowl combine 1/2 cup of peanut butter, 1/3 cup of honey, 1 cup or more of quick oats (depending on how much you like), a handful of MnMs or 1/4 cup of chocolate chips, and if you want you can add a couple of teaspoons of flax seed for an extra boost of fiber and nutrients that your body will benefit from in many ways.
Step 2: this batch should make about 12 small balls, depending on the size you make. So roll the mixture into small balls.

Step 3: put peanut butter balls on pieces of wax paper and put in a tupper wear container to cool and you are done! Pull them out anytime you want to grab one and then set back into the fridge.

cinnamon muffins

A really simple and fast breakfast or snack idea is mini-muffins. my family has a recipe for cinnamon muffins that we usually put in a mini muffin container, but recently we bought a muffin maker that makes small individual snoopy character waffles. we found that this waffle maker is also great for muffin batter and brownie batter! so here is my recipe for cinnamon snoopy muffins.

Step one: in a large mixing bowl add dry ingredients. 3/4 cup of Malt-O-Meal, 1 1/4 cup of flour, 1/2 cup of sugar, 1 tablespoon of baking powder, and 1/2 teaspoon of salt. this recipe is for a regular muffin, add 1 teaspoon of cinnamon into the batter.

Step two: whisk together the dry ingredients

Step three: make a well in the middle of the dry ingredients for the liquid ingredients
Step four: add in liquid ingredients. 3/4 cup of milk, 1/4 cup of vegetable oil, 1 egg, 1 teaspoon of vanilla.

Step 5: whisk together liquide ingredients and then gradually mix in the dry ingredients

Step six: after muffin maker, or in this case waffle maker, is hot and ready pour in muffin mix, keeping in mind that the muffins will rise more than you think. set the timer for 5 minutes to take the muffins out.
Step seven: on another counter set out two bowls. one for melted butter and the other for cinnamon and sugar. 

Step eight: when 5 minutes timer goes off use a tooth pick and poke he center of a muffin. if the tooth pick comes out clean they are done. then use a tooth pick and/or fork to take the muffins out and set onto cooling rack

Step nine: lastly dip the top of each muffin into the melted butter and then into the bowl of cinnamon and sugar and enjoy! 


Sunday, February 14, 2016

bathroom hacks


 When you think about it our bathroom is a very strange room compared to every other room in the house. It’s one of the smallest rooms where you store the most stuff, and it gets more wet and humid than another room. So here are some hacks I came up with that have helped me in my bathroom.

If you have a sink with a cupboard or drawers underneath (which I highly encourage to have if you have the room) to add more storage space add 2-4 inch supports on the corners of the bottom of the sink vanity. You can use this room to store your scale or any small box. For example at my house we use a shoes box and wrapped it with nice paper and made a handle out of the paper to allow easy access to the box. We store our magazines, a blow dryer, and a curling iron in the box. The 2-4 inches is an easy instillation and that little room can go a long way.

At the store you can buy little clips that have a suction cup attached to them. Use of these in the shower to clip back your shower curtain after you have finished taken a shower. It will allow the curtain to dry off faster instead of leaving the shower curtain bunched up and wet creating mold.

Another suggestion for your shower curtain is to use plastic curtain hangers instead of metal. Metal allows rust to build up and it can be a pain to clean all the time.

NEVER have carpet in your bathroom. A lot of older homes still have the outdated look oh carpet in the bathroom, and some people today still think it’s a good idea. Well it’s not. Think about it, your bathroom is the one room that gets the most humidity and is the room that you are always using water in. carpet and water, don't mix well. It’s the easiest way to grow mold, and the hardest flooring to clean. Any type of flooring has the ability to grow mold, so my suggestion is to have a timed fan build in to your bathroom. Most homes already have fans build in but to have a timer just makes it so much easier to set a time for the fan and not have to worry about turning it off later.

This next tip you will probably think is a no-brainer, but I find some people still don't understand. Do not put hair down the sink or shower drain! Always use the trash. It is not too much of a pain to clean out the sink and put the hair in the trash rather than washing it all down the sink. It is far better than having to deal with a clogged up sink later on.

how to protect floors from wet and dirty shoes

Where I live it's getting that time of the year where the snow is turning into slush and it ruins all your shoes and back of your pants when you walk through it. whats worse than walking through the slush is then tracking that mucky mess into the house. to protect your floors from the mud and water you may try a shoe rack, however a shoe doesn't help you much if your shoes still drip mud and water onto the floor. my suggestion is to have a shoe mat instead of a shoe rack. the mat should have a boarder around it too keep water in and off the floor. another suggestion is to get a shelf or cubby holes to put shoes in. its an easy way to store them without taking up as much space if you were to lay all the shoes out on the floor.
When you are younger you should have learned to wipe your feet off and leave the shoes at the door. however kids can be very forgetful, and so can you as you get older. when you are in a rush to come in grab something and go, you don't really want to take the time to take off your shoes, so what ends up happening is a big mess of dirty shoe prints all through out the house. its best that in front of every entry way there is a section of linoleum or tile, and i suggest that on that surface you lay down a washable rug to wipe off your feet. what's difficult with carpet is that it's hard to wash. if you lay down a rug it should help to protect your carpet and flooring.


why teenagers rooms are so messy

the other day i was asked the question; why are teenagers rooms so messy? and so i was ready do answer back when i realized i had no idea why teenagers rooms were so messy. from a teenagers stand point i can argue that we are too busy and our lives are too hard, but on the other hand i know many times when i am laying around doing nothing and i'm really just too lazy to clean my room. i don't know if this makes sense but i have to be in like a cleaning and organizing mood to have the energy to clean me room. however i will clean my room if i have an incentive such as if i am told i cant go out with my friends if i don't clean. so why are teenagers rooms so messy? well here are my reasons why, and my reasons why sometimes our reasons are just not good enough.

teenagers spend 7 hours at school, then ,depending on what activities they are in, 2-4 hours after school, and then 2-3 hours of homework afterwards. that's about 9 to 14 hours they spend doing school activities or being at school. leaving about half of the 24 hour day to sleep. if teenagers need 7 to 8 hours of sleep then they are looking at about 2 to 5 hours left in the day to do other things such as clean our room, eat, socialize. So you could say their school week is too busy to clean their rooms, and because of their busy schedules their dirty clothes, garbage, and more just builds up on their floor and on our bed as the week goes on. Rushing out the door in the morning and in and out of the house through out the day is a cause of clothes and garage being thrown on the floor instead of taking the time to put them away. by the time the weekend comes around most teenagers are too tired or bust with other activities and homework to find the motivation to clean up their rooms. i think why some parents don't understand how a teenagers bedroom can be so messy is because teenagers tend to spend most of their time in their bedroom when they are home, unlike parents.

most of the time i would say all of these reasons are legit and are a good enough reason not to clean my room, however i also see how some of these excuses are bogus. such as when teenagers say to their parents "you don't understand i'm just so busy", and i think why parents don't believe that is a good enough reason is because they also are busy. with work and taking care of the kids. however going back to my earlier statement parents don't worry as much about needing to have a lot of time to clean their room because they are not in their bedroom as much as teenagers. to be honest teenagers are just too lazy to clean their room. maybe that is just me but i found from asking other teenagers they agreed that they are to tired or lazy to do so.

so my answer would be that teenagers rooms are always to messy because they spend almost all of their time in there when they aren't at school, they have way to bust of schedules, and frankly teenagers are just tired or too lazy when they do have the time to clean their rooms. teenagers like almost everyone, need an incentive to get them to clean their room, or to do anything for that matter. so if case you are wondering that is why teenagers rooms are so messy, from a teenagers perspective.


Saturday, February 6, 2016

tips when it comes to decorating your wall

When picking out what to put on your empty wall, or over the couch an idea is a painting, family pictures, or a printed photo on canvas. Depending on your preference will tell you what would go best in your home. You can make any three or all three look good in your home. To make a painting or picture match a room is as easy as having a simple color palate for everything in the room. For example you could have a grey room with a black couch, and blue and gold pillows. So you pick a painting that goes well with those colors.

Pictures can give a more personal touch to the room. Usually family pictures, or school pictures aren't that big so my suggestion if you have a large wall is to put up multiple pictures is some sort of order or pattern and/or surround them with smaller pictures, a mirror, a clock, words, or the letter of your last name. 

A painting can be great because they can vary from so many different styles and colors. It’s also great if you have an artist in the family because hanging their art gives a display of their work and add personal meaning to the decoration. The easiest type of painting to put up in a room is a simple abstract painting. Abstract doesn't always mean busy pictures with many different shapes and colors. Simple paintings can be just a mixture of a couple colors blended together. These are easy to use for decoration because you just find a painting that has the colors that are already used most throughout the room. as i said before you should make a color palate of the main colors and accent colors in your room and then go searching for a painting to match.

A picture that has been printed on canvas i think can be very pleasing to the eye. A picture on canvas can be anything you want. My favorite is nature pictures; they look like they could be an extremely good painting. The other great thing about a picture printed on canvas is the editor of those pictures can customize it and give is a certain color filter to make it match your room better. For example you can get a picture of a close up of a sunflower and if your room has colors such as black, grey, blue, and gold, you can customize the picture to have a blue sheer filter over it and fade out other colors in the background. Or make the entire picture black and white and then add in splashes of color in the flower. It is all up to the editor of the picture. Pictures on canvas can be make for any theme because you can anything you want printed onto a canvas. 


Mixing some of these elements together can either turn out great or just look like a mess. Advise to putting multiple paintings or pictures on the wall is that they all should in some way match and the placement should have a sense of symmetry. basically if you step back and you sense something about it is uneven or one pictures or painting stands out way to much than the others then something needs to be replaced, removed, or added.

valentines day gift


Valentine’s Day is coming up and usually people split into 2 different categories, people who love the holiday, and people who dread February 14th every year. Whether you love the holiday, or hate the holiday, I think we can all agree that we all love what Valentine’s Day brings us, chocolate. Depending on how old you are, or how big of a commuted relationship you are in during Valentine’s Day will influence what you get your significant other for Valentine’s Day. This goes out to teenage boys in a relationship, or teenage boy who has a crush on someone, there is no better gift than chocolate. They may say diamond rings are a girls best friends, but personally, I’d go for a box of chocolates or some chocolate covered strawberries any day. I only have one brother and when he was in high school and had a girlfriend I was only 11 years old, but I remember this very clearly. I remember my brother in the kitchen all day making his girlfriend chocolate. Awe how sweet right. His girlfriend loved that he put so much time and effort into them, and he didn't have to spend any money either. I think the best gifts are the ones that are made, of course i would take a trip to Paris any day, but homemade gift give sentimental value that can’t always be bought from the store.

Here are some of my favorite Valentine’s Day gift I found on good old Pintrest.
Pop up picture box:
https://www.brit.co/valentines-day-photo-box/
Five sense gift:

https://stephaniesprojects.wordpress.com/2015/02/12/valentines-day-5-senses-gift/  

Sunday, January 31, 2016

new Samsung family hub refrigerator

      Lately I have realized that appliances have become more than just their original purpose. Appliances that we use on a daily basis are becoming more innovated every second of everyday. One of the new appliances by Samsung that I find most interesting is their new family hub refrigerator. I am on the fence of how I feel about this new appliance, if I think it is great or to over the top. So far I’m mainly leaning towards it being a great new appliance and here's why.
      The new family hub refrigerator is like many of the newest refrigerators out there, with plenty of storage space, customized freezer down below that can be set to any temperature needed, great stainless steel, and of course a water and ice dispenser on the outside. However what making the family hub refrigerator much more innovative is that it has a touch screen on the exterior of the fridge. We all knew this was coming where we would have touch screen on our fridge and now it is finally here. Many other companies have tried similar things with iPod and iPad holder on the outside of the fridge, or of course many refrigerators already had the small touch screen above the water and ice dispenser. What makes this one different is that is it always attached to the fridge and does much more interaction with you and the fridge than an iPad or the water dispenser touch screen ever did. For one the screen display combines most things you have on your kitchen counter, or on the fridge. Such as a notepad, calendar, clock, weather, and the temperature of inside the fridge. There are so many useful things you can use the touch screen for such as order groceries online, play music, and it can help you plan meals. Furthermore the screen interact with what’s inside the fridge because you can use the screen to organize your inventory inside the fridge without even opening the door and keep track of how many days everything in the fridge has tell it expires.
Family Hub Refrigerator by Samsung - Touch Screen     This refrigerator seems like the best thing you could have in your kitchen but is it too much? Many people could argue that we are becoming too reliant on technology and I think that is a really good point. If one day the power goes out, most people freak out because they can’t use all the appliances they use on a daily basis, but what they don't realize is that at one point, probably in their life they survived way longer than a couple hours without that technology, and internet. People already spend like 10 minutes standing in front of the fridge with the door open looking for something to eat. Now I can picture people spending 15 minutes in front of their fridge messing with the touching screen. Yes I do think this refrigerator could be one awesome appliance to have in a home, but is it truly necessary? I survive just fine with my regular fridge, a regular clock on the window, a paper calendar, and sticky notes for notes and grocery lists. What ever happened to refrigerators covered in kid’s art, family pictures, and the millions of magnets that you may not even remember where you got them from. innovation is great, but everyone can have the same exact refrigerator, but those finger paintings and school pictures are what make it personal.

kitchen hacks

Everyone likes short cuts and cheats in life that can make your life easier so here is a list of hacks I have learned from experience in the kitchen that you may or may not already know.

Save peelings from lemon and oranges to use after you do dishes. Put them down the sink's garbage disposal and it will eliminate the smell from the dirty dishes and food.

To keep your garbage from becoming too smelly use a smaller trash can. The garbage will fill up faster and it may be a pain to take it out more often but it keeps your trash from sitting there too long and becoming too smelly.

What stinks up your garbage the most is food that becomes rotten before garbage day. a tip to keep this from happening is to take your egg shells, any kind of food peeling, any food that isn’t cooked or half eaten and stick in a plastic container you don't care about and can be reused and stick it in the fridge. I use an empty, and cleaned out big square plastic ice cream container. Keep it in the freezer and keep added scraps of food as the week goes on. On garbage day dump it out into the yard waste bin. It keeps your garbage from smelling and helps the environment because the food is able to decompose and be reused in things such as fertilizer.

Is it dry in the house? Don't have a good enough humidifier? Put a coffee or tea pot on the stove full of water with the lid off and heat to add humidity in the house.

Common fact that you may or may not know is that hanging your bananas keep them ripe longer. Banana trees can be found at many stores around you.

Reusing containers is a way to help the environment and save you money. If you ever buy those small butter containers they make great storage for when you have a small amount of food left over and normal Tupperware containers are way too big for the amount of food you want to save.

We tend to think that appliances and kitchen utensils can only be used for what they were designed for, that is called function fixation. To overcome it you have to think of the other possibilities for an object's use. Such as a waffle maker can be used to cook more than just waffles. It can be a fast way to cook, hash browns, bacon, waffle shaped cinnamon rolls. Also a potato masher can be used to chop up avocados and other soft foods, and an apple slicer can slice potatoes and other foods. Don’t go out and buy 3 different types of tools when one can do all 3 jobs. 

This next tip I thought everyone knew until the other day when my friend was having trouble scooping out the ice cream and she was amazed by how i solved the problem. So for anyone who doesn't already know, all you need to do is rinse your spoon under hot water and then it can scoop up the ice cream much easier.

Sunday, January 24, 2016

mason jar candle


Candles are a great decoration for your home because they can be both a beautiful decoration, and a useful thing to have around for light and to add a fragrant throughout your home. everyone has those ugly candles that do not look the best out for everyone to see so they hide then in their cupboard for years, I know some people are really bothered when the candles do not match. a way to hid an ugly candle and make your candles match is to make a decorative candle holder. A really easy and fun craft you can do if a mason jar with clear pebbles glued on around it. It is as easy as two steps, glue and light. The effect that the candle makes is also very mesmerizing, the pebbles reflect the candle's light and makes it looks as if the lights are dancing all around the table surface when the candle's lights flickers.
What you will need:
one mason jar
hot glue gun
a lot of colored but slightly see through glass pebbles.
small candle that can fit in a mason jar. It’s easiest if the candle already has its own glass holder.

Step one: use hot glue gun to attach pebbles to mason jar.

tip- using different colored pebbles can add a cool effect and if you use different colored pebbles you can created patterns when gluing them on.
tip- be careful of hot glue but also go quick because the hot glue will dry fast when applied
tip- test out how the pebble looks on the mason jar before you glue is on because once it is on, there is no going back. if you mess us and didn't calculate correctly and end up with a space that you cannot fit a marble in, it is possible to break a marble and make it fit. it may not be the best way to do so but you can barely tell and you can always just turn that side so no one sees it. i did exactly that and unless you look closely is just blends in with the rest.

Step two: place candle inside mason jar and you are done!! It is as easy as two steps!

tip- the brighter the candle is the more of a reflection of light you will get from the pebbles.
tip- the lower the candle is the more of the pebbles it is able to reflect off of.